There is a lot to think about when picking the perfect kayak. But there is an equal amount when it comes to roof racks. So what IS the best way to transport a kayak?
If you plan on using a non-truck to transport your kayak you are going to need some straps and something to mount it to your vehicle. Depending on you kayak you make be limited on your roof rack choices and those limitations can be expensive and if you try to take a shortcut or rig something up that is “good enough” you maybe jeopardizing your safety. Please do not take this lightly as a flying kayak can be a killer.
A good roof rack for your kayak can be the perfect way to transport your kayak. They all come with different ways to mount and tie down your kayak and I have tried them all. At the end of the day they all work. But some work better than others depending on your vehicle, personality and physicality.
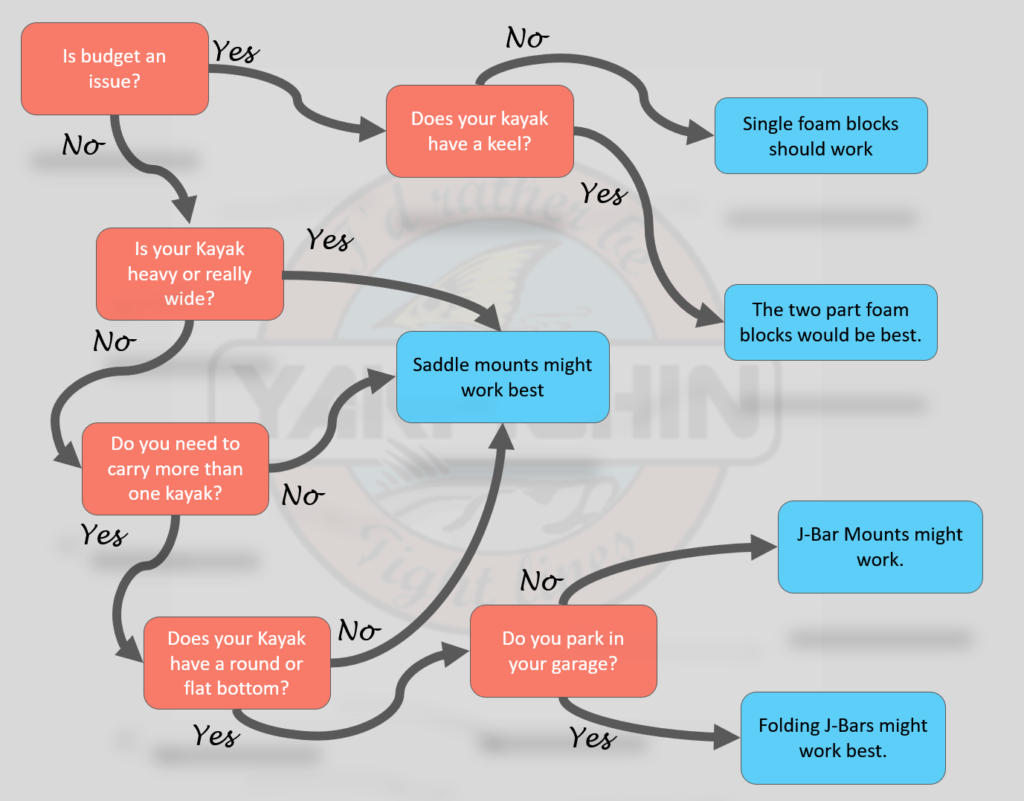
The three main ways to carry your kayak on the roof of your vehicle. There are foam pads and straps, factory roof rack that comes with your vehicle and the aftermarket roof rack system. Picking the type of system might seem like a personal choice but it really comes down to the shape and weight of your kayak and how you might use it. and what type of vehicle its going on. So here is my break down on how I feel about each one so you can use it to help form your own decision.
Kayak Weight is a Big Deal
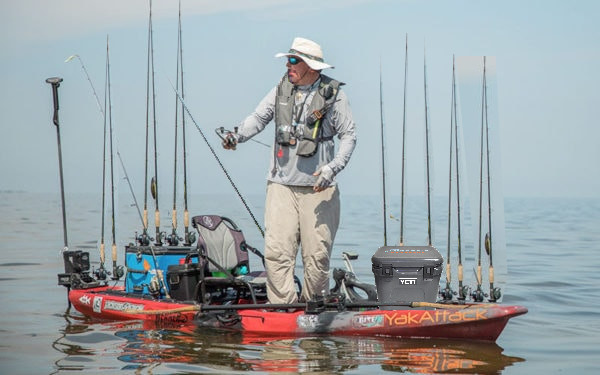
The thing I want you to walk away with about roof racks is kayak weight is a BIG DEAL. Even bigger deal if you drive a full size SUV like I do. Not just from a safety aspect but trying to roof your kayak after a long day of paddling can be a buzz kill! Twenty-five years ago kayaks that were over 50 lbs where considered heavy. Back then kayak launches didn’t really exist so portage was a big deal. My favorite put-in was 100 yards from the road so kayak in one hand and fishing gear in the other was a time saver. Now a sturdy fishing kayak’s often see 60-70 lbs and if you start getting into pedal or motor dives 125 lbs takes it from a kayak to a small boat.
What you drive makes a difference
Picking up a kayak and getting on top of your SUV while it sits in the driveway is much easier than at the kayak launch in the driving rain after an 8 hr paddle into the wind and against the tide. I used to have rollers on the back of my roof rack and loaded my kayak from the rear. I thought it would be easier because I only had to lift one end. However it was a rare occasion where the sand covered bottom of the kayak didn’t get rested on the roof while I wiggle and jiggle it to get into the rollers. I would then lift the other end up and roll the kayak onto the roof. I would love to tell you that it worked great but on those days where the arms and legs are jelly I would always seem to add a scratch or two to the top of the bronco. Today they sell rubber mats that hang of the back of your SUV but for me that is just more stuff I have to pack, clean and put away. Keep it simple.
When I went from an old school full size bronco to the more modern explorer I got rid off the rollers and figured the mid size SUV was low enough to just pick up the entire kayak and load from the side. This worked most of the time, but again on those jelly arm days I came up short more than once and even broke a side mirror when the rivet to the rubber handle gave way. I am probably making it sound worse than it was but at some point I gave up on the roof rack and switched over to a pick-up where I could just throw it in the back.
Not all Kayaks fit all roof racks.
But a lot of us don’t have trucks (I have switched back to an SUV) so if they seem like they will work for you understand not all kayaks will fit the same. So you want to match your roof rack with your kayak.
Foam Blocks
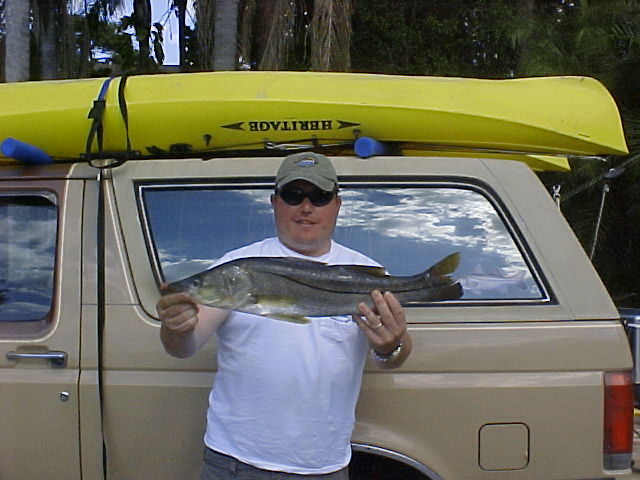
Note the swimming pool noodles. This was right after returning from WINNING my first Kayak Tournament in Tampa, FL which was about 50 minutes from the house. Because of my keel that ran down 60% of my kayak I had to flip the kayaks over which sucked. They slid all over the place and the round noodles never stayed put. It took me forever to get these things secured. I used to get so worried they would fly off and kill someone. Right after this trip I upgraded to a thule roof rack.
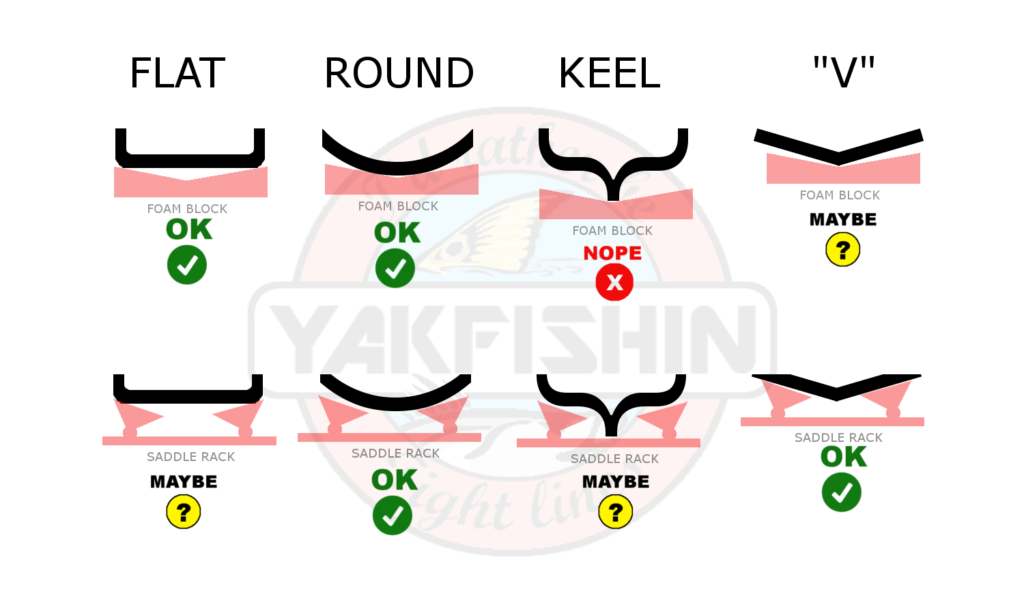
The most simple way to transport your kayak on your roof is to use foam blocks. Personally I think this are better suited for surf and paddle boards as their is no way to get a snug fit without carving up the blocks if your kayak has any kind of shape to it. If this is how you plan on traveling with your kayak having a flat or round kayak bottom will work best, but these boats don’t track well and get blown around in the wind a lot more but if you are going total economy package most big box store kayaks are basic round bottoms and are perfect for traveling on foam blocks. These kayaks are for fun little paddles on those nice calm days. If you are thinking of going a little more extreme you want something that tracks well in the surf and wind. With that comes a keel so foam blocks might be an issue.
If you still need to go the economic way I would make sure you get closed cell foam. It is very dense and durable and also found they grip better than swim noodle or other foam you might give a try. There are all kinds of DIY Noodle Kayak ideas out there and I have used them but they don’t last and you end up buying more and more noodles which ends up costing more than the closed cell foam blocks.
Your Kayak’s Keel makes all the difference
If you do go this route figure out how to accommodate the keel of your kayak. There are single block solutions that have a v or u-shape but the keel will still impede a good fit so you will have to get creative which might lead to having to buy more blocks. The best solution is to find blocks that can cradle the hull and leave the keel free and clear. The SportRack SR5527 is a perfect example.
If you do go with the foam block check on the strapping recommendations. Some require you strap the block down AND then strap your Kayak down. So you may also have to get two more straps. Also, I never could get things tight enough so the kayak always twisted on the roof if I just strapped around the roof so I started using straps on the bow and aft to keep things snug in all four directions. Amazon sells these cool tie downs that fit under your hood and tailgate. I also recommend using these ratchet rope tie downs. They have a quick release and you can get them tight (but be careful you can also get them too tight)
After Market Roof Racks
Most of them are high priced but well worth it. I have owned both Thule and Yakima and they are both solid options and if you are the type of person that will spend the extra money to know you have a proven solution that you will never need to worry about high highly recommend either brand. However, you need to keep reading because there are other things that you need to consider.
Transporting several flat bottom kayaks with J-Bar type mounts
J-Bar
First are the j-Bar type of kayak roof racks. They get their name because they are shaped like a “J”. If your vehicle has a factory rack you can get universal J-Bars that will mount directly to your stock rack. J-Bars are most useful if you are mounting more than one kayak on your roof rack, but if you keep your vehicle in a garage it will most likely be an issue unless you spring for the folding j-bar.
I have used j-bar racks before and ended up ripping them off at the Tampa Airport Parking garage when I drove into the low ceiling. I still made my flight but it was one of my better moments… thankfully it was before cell phone s had video cameras!
The one thing I do like about the j-bars was strapping the kayaks in. It was easier than the saddle mount or foam block. I didn’t have to throw the straps over the truck because they were easily attached to the top of the “J” so all I had to do was reach up and grab them. They were also a bit easier to load from the side. I could almost just throw the whole kayak into them and they kind of just caught them. I do reccomend JBars to transport your kayaks if you have a factory rack and don’t garage your vehicle.
SADDLE MOUNT
Second are saddle mounts that allow your kayak to ride in its natural position. Your kayak’s hull sits in “saddles” and then gets strapped to the roof rack. To me these are the best solution when transporting your kayak on the your vehicle. They also can be mounted on factory racks or purchased as part of a high-end rack system. Not only does your kayak sit the way it should, but they can handle much more weight and the have an actual chance of fitting in the garage.
You can adjust the width and most of them lift the kayak’s keel out of the way so they become extremely versatile giving you the best chance for working on any boat you my buy in the future. So if you are going for a big heavy fishing kayak this is the way you go.
I also felt the kayaks were more secure. For long trips this is a must and if that isn’t enough your kayak at 75 mph is far more quite with a saddle mount because catch less air and put less torque on the kayak and rack. When everything is strapped down in parallel you will cut down on the humming and whistling.
If you are thinking about transporting your kayak on the roof of your vehicle I highly recommend these type of mounts. Just make sure your kayak will clear the roof or crossbar to your rack. Also, I have done the wheels on the back for rear loading and didn’t find it to work well for me. I am sure they have gotten better but still can not justify the extra money. Plus when I get the choice I always go with less moving parts so I don;t have to deal with them wearing out and breaking.
A good roof rack will only require strapping to the rack (black). However cheaper racks or foam blocks may require additional straps in the front and back (green)
Transporting with Lift Assist and Trailer Hitch Kayak Loading Systems
In closing I wanted to mention Loading systems. Since the explosion of kayaking every manufacture has been trying to build more and more things to sell. With that I have seen many innovative ways to load your kayak but most of them are extremely expensive like the Thule Hullavator Pro which starts at $700 and has a weight limit of 40 lbs!! Because of this I have never owned one so I don’t have an opinion on how they work but I will say most of them require more stuff and have moving parts which break two of my fundamental rules. However, if you are small in stature and 40 lbs might be 40% of your own weight I can see how this devices are the only way you can top your kayak so for those folks it may be money well spent.
Lastly, when it comes to those T-Loader devices like the one Rhino sells for $470 they do seem like they would work well and should get rid of the headache of trying to get your kayak topped without hitting your vehicle with a dirty kayak bottom. However it prevents access to your tailgate which is a pain in the ass if you forget to pack something or even worse if you are in an accident and the only exit is your tailgate. As you can tell I am not a big fan of extra gizmos mostly because I have spend hundreds if not thousands on all these “good ideas” only to revert back to the most basic solutions.
Finally, if you have not made your purchase you really need to think about how you are going to transport your kayak. The last thing you want to do is spend your entire budget on a killer kayak only to find out to transport it correctly will require almost the same amount of money you just spend on your yak.